# Interface Overview
# Navigation and Layout
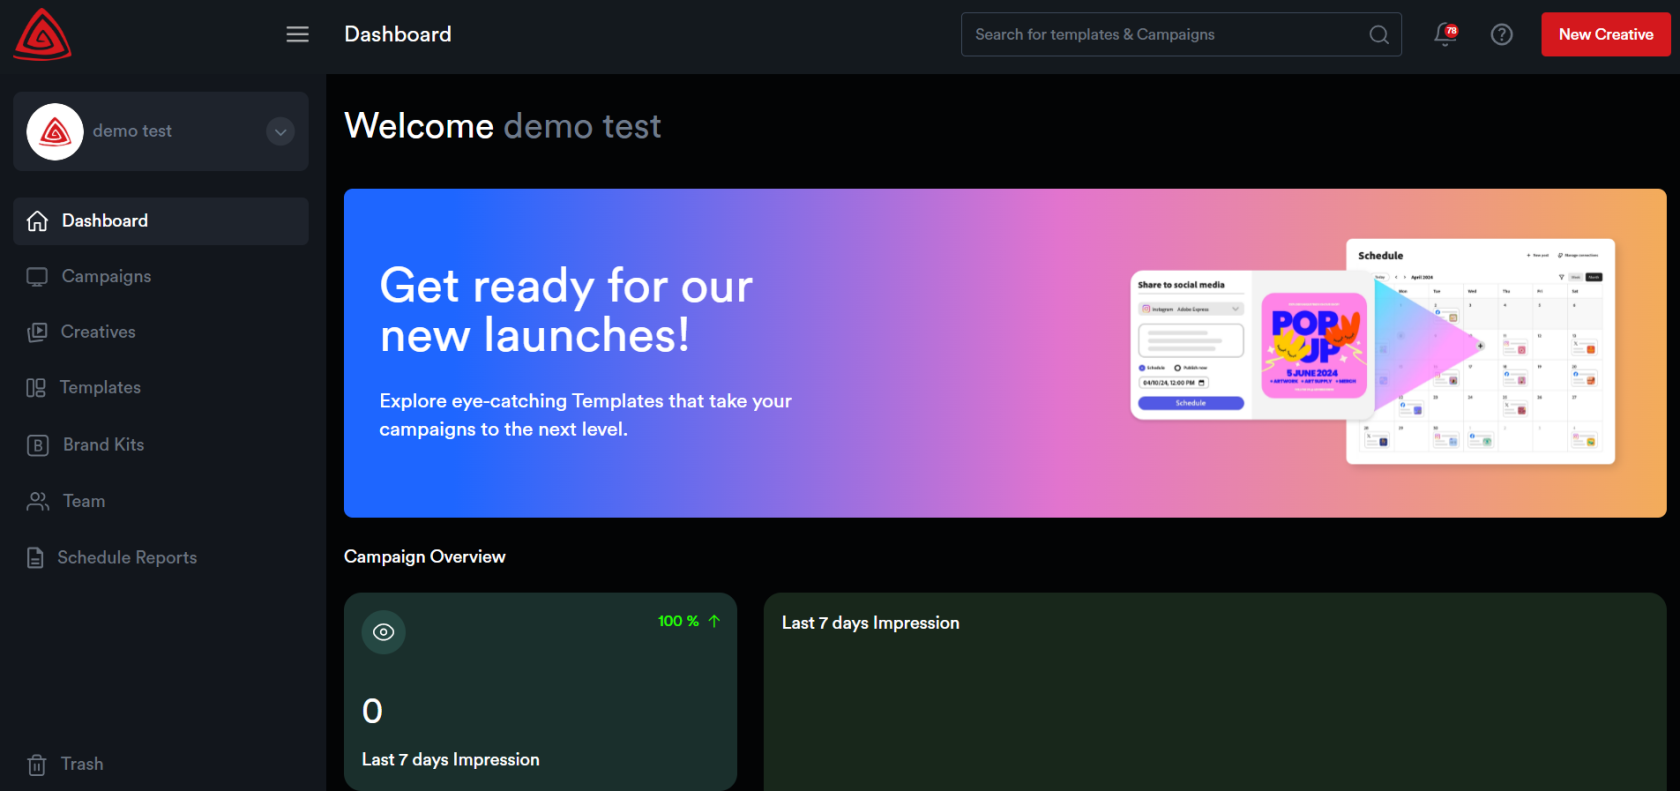
##### The Adctv Studio interface is designed for ease of use, with a clean layout and intuitive navigation.
[](https://docs.adctv.com/uploads/images/gallery/2025-07/navigation.png)
##### Left-Hand Navigation Menu:
On the left side of the screen, you’ll find the ****Navigation Menu****, which allows quick access to key modules within the platform:
· ****Dashboard**** – Your homepage showing campaign stats, updates, and quick links.
· ****Campaigns**** – View, create, and manage all your advertising campaigns.
· ****Creatives**** – Manage and build your ad creatives here.
· ****Templates**** – Access pre-built templates to speed up creative development.
· ****Brand Kits**** – Store your brand assets such as logos, fonts, and color palettes.
· ****Team**** – Manage your team members and their roles.
· ****Schedule Reports**** – Set up and view scheduled campaign performance reports.
· ****Trash**** – Recover or permanently delete removed items.
##### Top Navigation Bar:
At the top, you’ll find: - A ****Search Bar**** to find templates or campaigns quickly. - A ****Notification Bell**** to view alerts. - Your ****User Profile**** dropdown (click on your name) to access profile settings. - A ****“New Creative”**** button to start building a creative from any screen.
##### ****Dashboard****
The Adctv Dashboard provides a summary of campaign performance over the last 7 days within your organization, displaying key metrics such as impressions and CTR.
It also lists recently created creatives along with performance indicators and offers quick actions like preview and edit. Additionally, the dashboard highlights newly added templates, making it easy to start building creatives right away.
##### ****Campaigns****
From here, you can create a new campaign. All previously created campaigns will be displayed here as individual cards.

##### ****Creatives****
Here, all creatives belonging to an organization will be listed.

##### ****Templates****
We offer a variety of predefined templates for ease of use, which will be listed here. Users can also create and save custom templates, and these will be displayed as well.

##### ****Brand Kits****
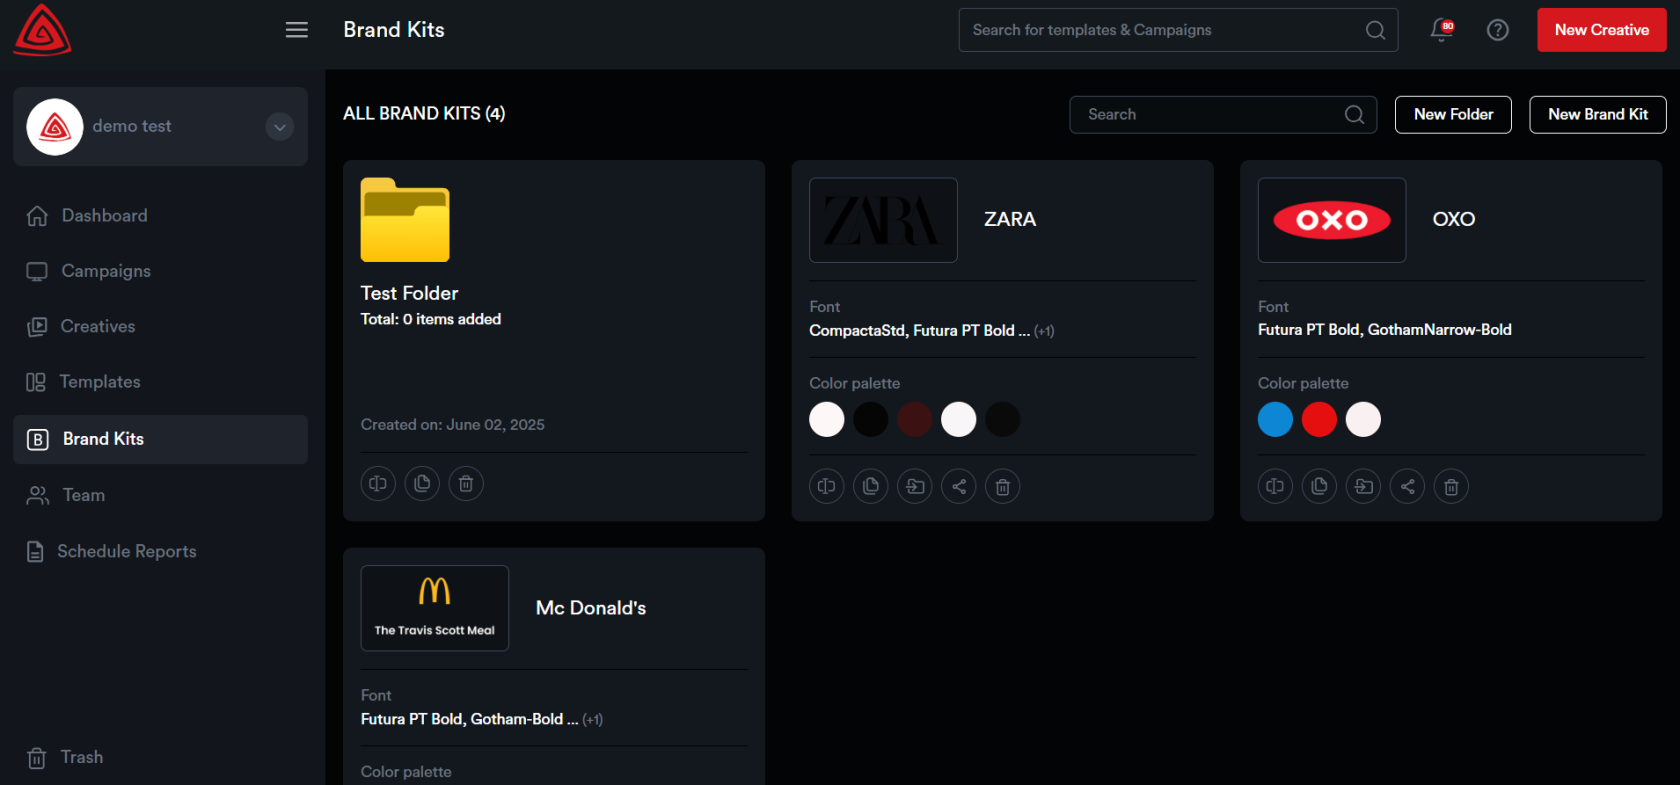
The Brand Kits module allows you to store assets for multiple brands.
[](https://docs.adctv.com/uploads/images/gallery/2025-07/brandkits14.png)
Users can effortlessly share their Brand Kit with collaborators via a unique link, granting them access to brand assets. Collaborators can upload logos, save color palettes, add fonts, and include other assets like images and videos.
This can be done by the Adctv user, or, once the kit is shared, the brand can upload assets themselves. No username or password is required for the brand to add items.
##### ****Team****
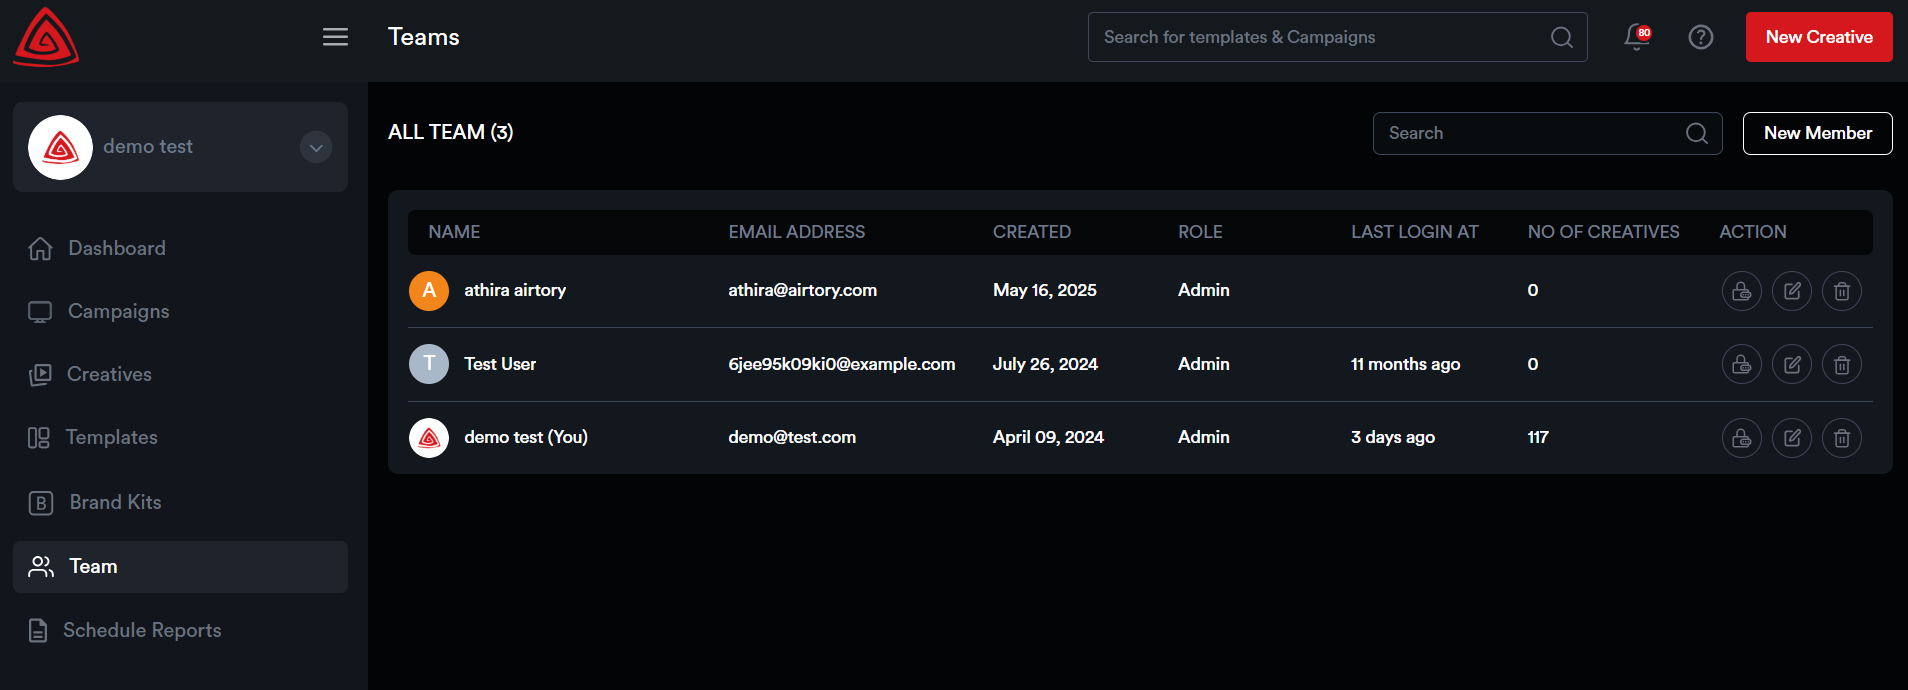
This module allows you to manage team members. You can create new users, edit existing user details, delete users, and change passwords for team members as needed. This module helps you maintain control over your organization's user access and permissions
[](https://docs.adctv.com/uploads/images/gallery/2025-07/team.png)
##### ****Trash****
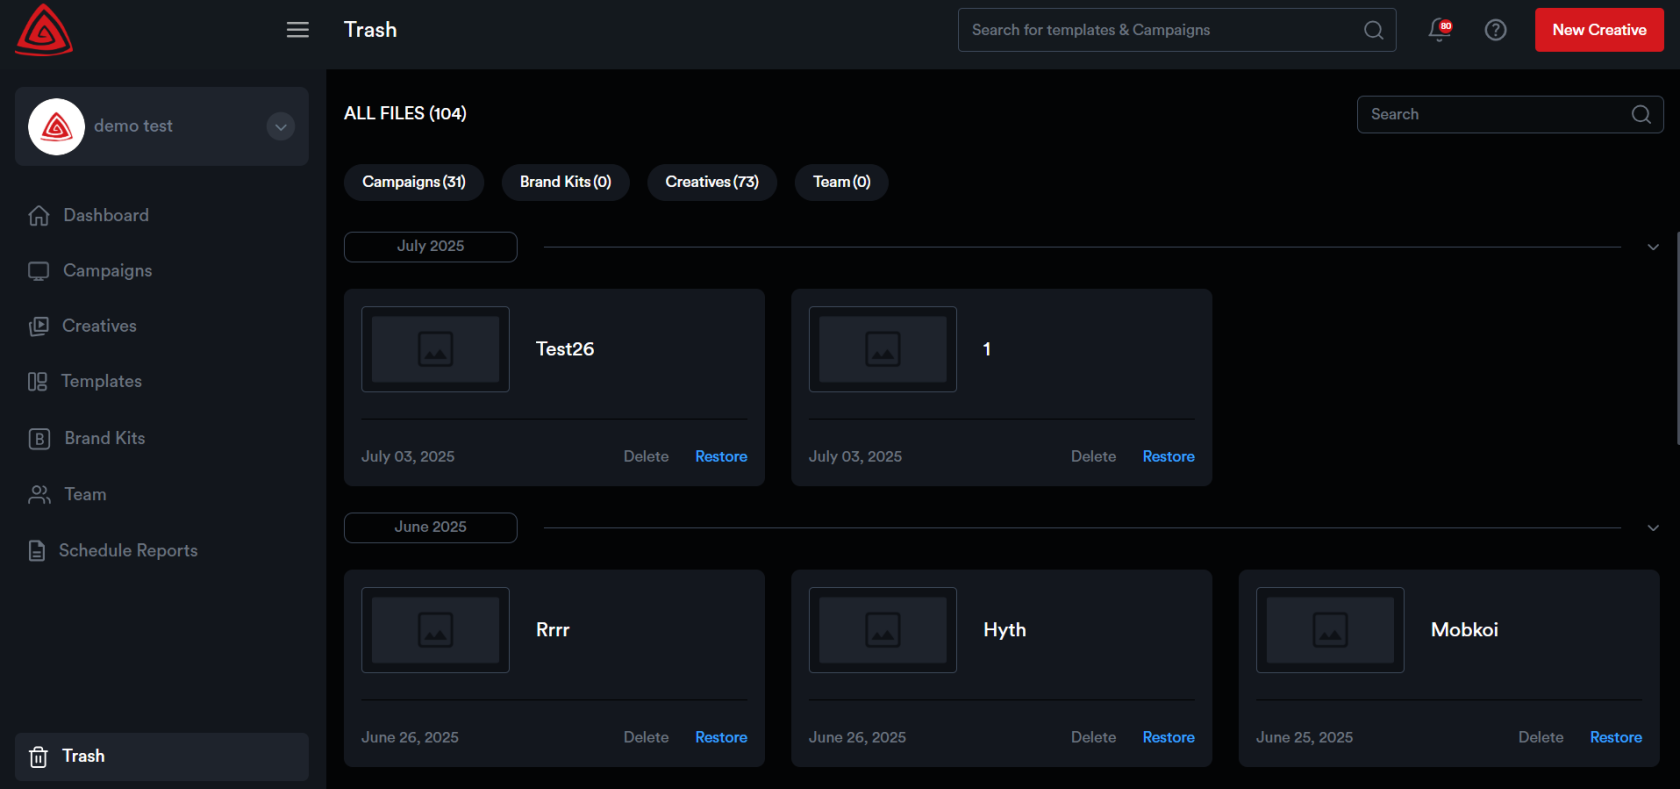
This module contains all deleted creatives, campaigns, and brand kits. Users can either permanently delete these items or restore them for future use.
[](https://docs.adctv.com/uploads/images/gallery/2025-07/trash.png)
# Toolbar and panels
##### ****Adctv Creative Builder****
Here is a quick walkthrough of the Adctv Creative Builder.
****1. Canvas****
Let’s start with the drag-and-drop ad builder. Here’s your canvas where you’ll be creating your ads.

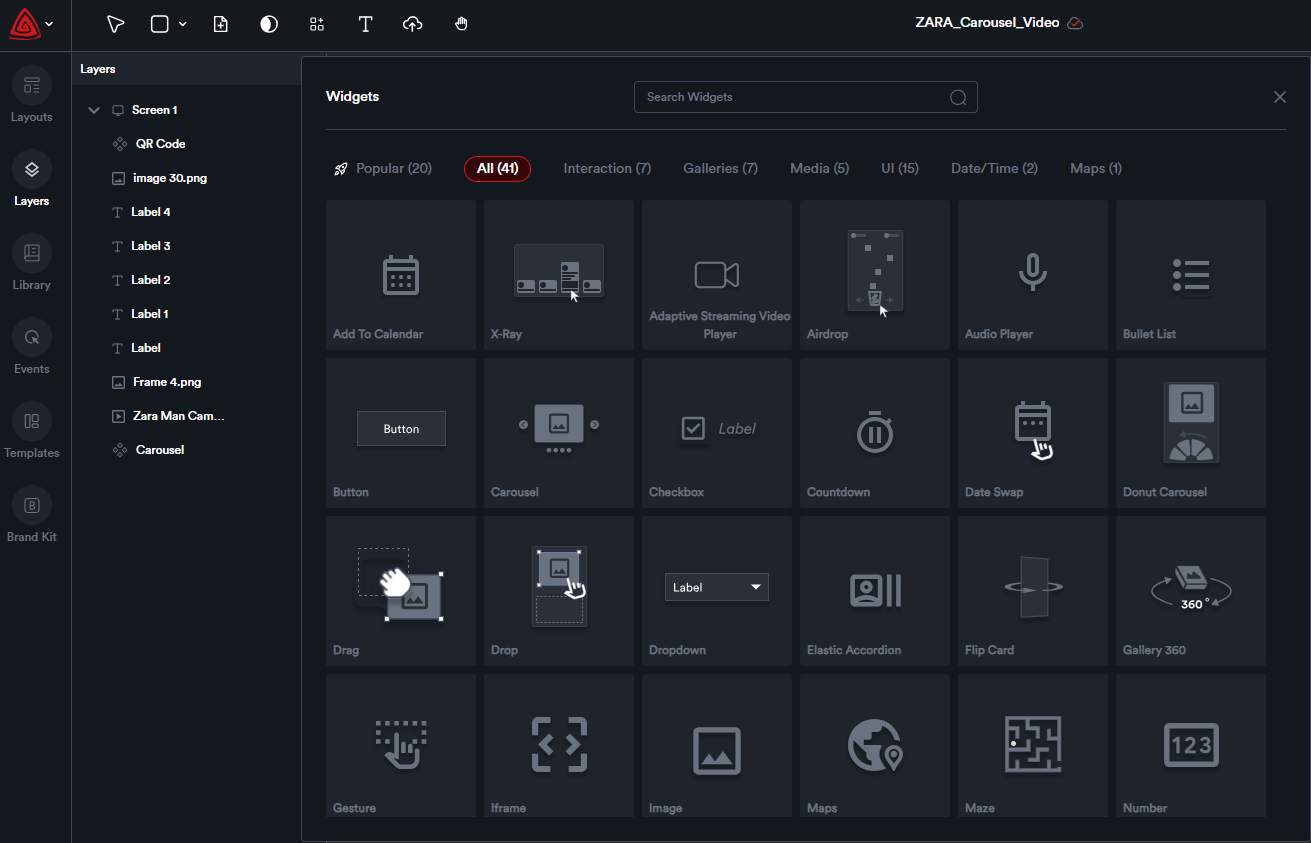
It’s simple to get started, just drag and drop components from the ****Components(Interactive Widgets) list**** at the top directly into your canvas.
[](https://docs.adctv.com/uploads/images/gallery/2025-07/image.png)
You can add new pages, view, and edit different pages/screens all in a single view.
****2. Toolbar****
The toolbar with various icons, each serving a unique purpose:

1 - Selector icon
2 - Add Basic elements
3 - Add Screens
4 - Add Interactive Widgets
5 - Text Element
6 - Asset Uploader
7 - Move Canvas
****3. Layers Panel****
Each component added to the canvas is automatically placed as a separate layer.

You can reorder layers by selecting the desired layer and dragging it to the preferred position.
Layers can be locked to prevent selection or editing. Locked layers are uneditable.
You have the option to hide or unhide a layer. Hidden layers become invisible on the canvas and cannot be selected or modified. To toggle visibility, click the corresponding icon.

Additionally, by right-clicking on any component within the canvas, you can duplicate it, delete it, undo or redo changes, copy its style, apply a quick animation, or send the layer to the front or back.

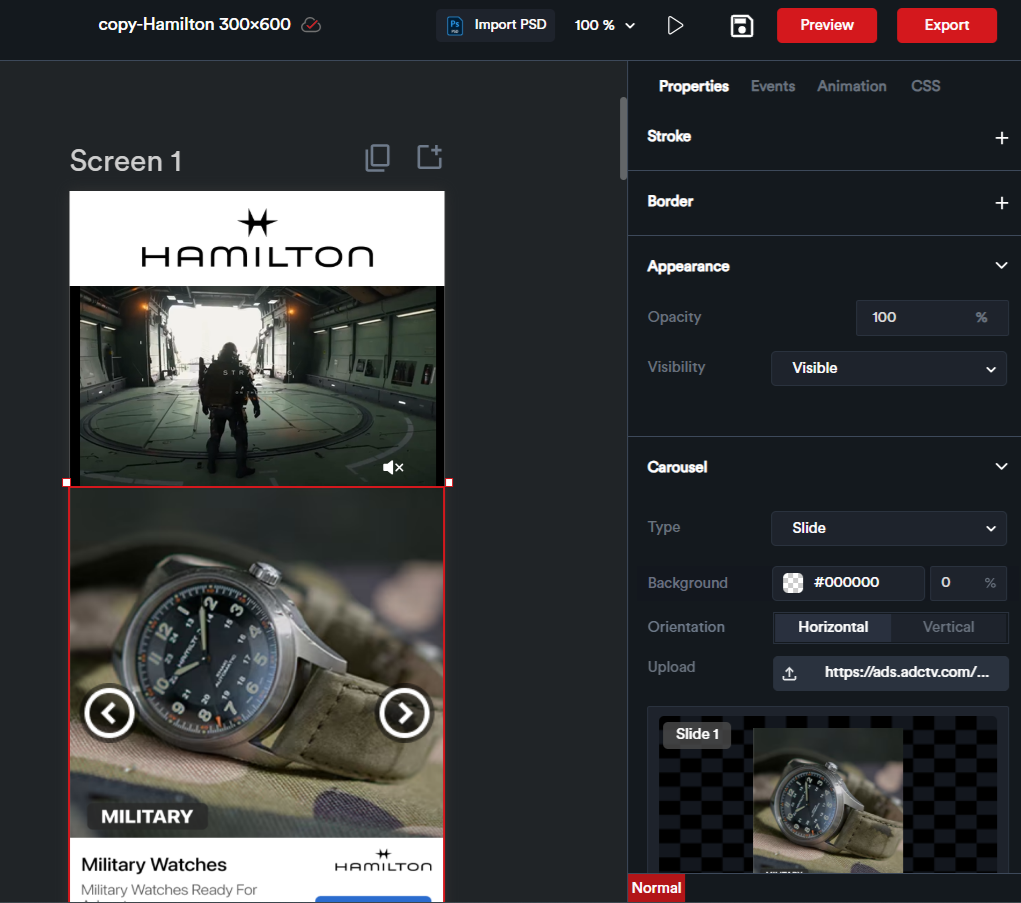
****4. Properties Panel****
After adding a component, click on it to open the properties panel on the right. Here, you can easily adjust settings such as size, color, position, and more.
[](https://docs.adctv.com/uploads/images/gallery/2025-07/4aFimage.png)
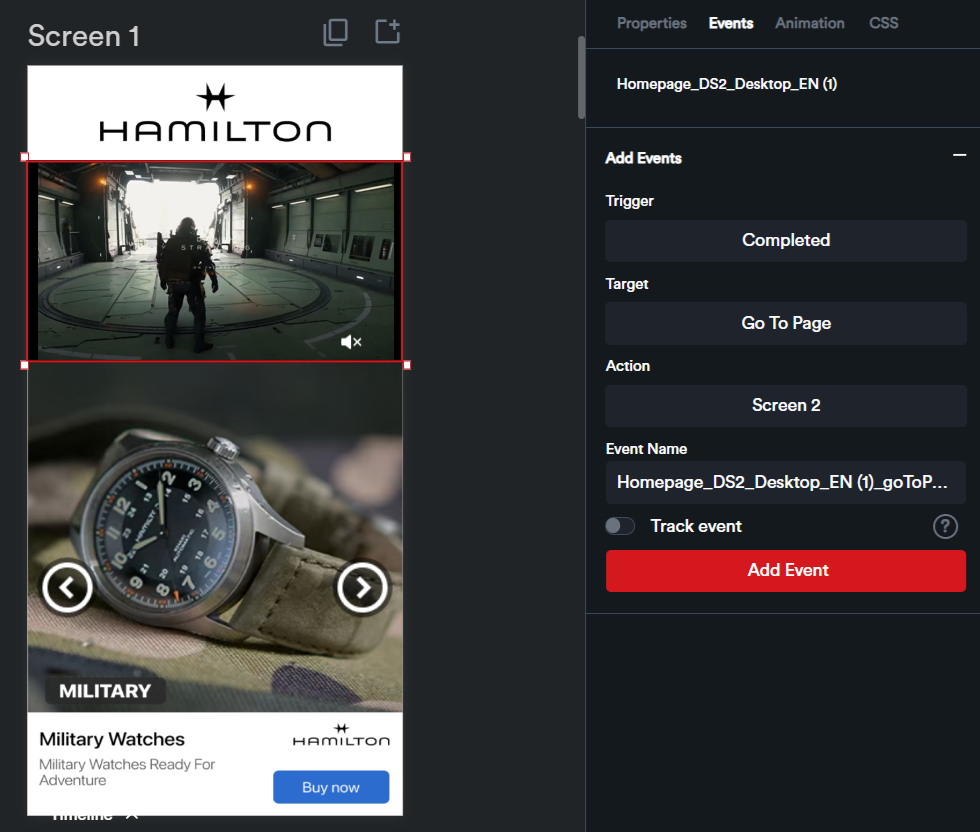
****5. Events Panel****
You can add events to control the behavior of your ad, such as defining actions triggered when a user clicks on an image or a button.
[](https://docs.adctv.com/uploads/images/gallery/2025-07/y54image.png)
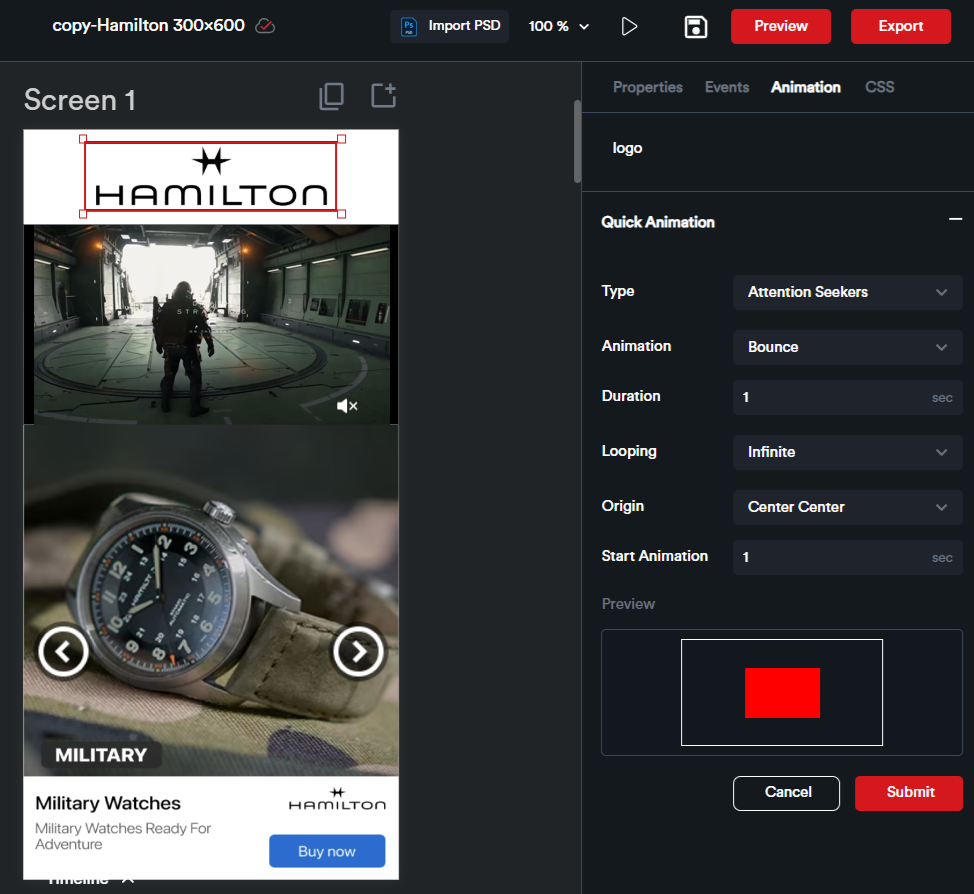
****6. Animation Panel****
Adctv offers a range of predefined Quick Animations for ease of use. From the Animation Panel, you can easily apply these animations to any element in your ad.
[](https://docs.adctv.com/uploads/images/gallery/2025-07/ZaFimage.png)
All the configured events will be listed here in the ****Events**** module.

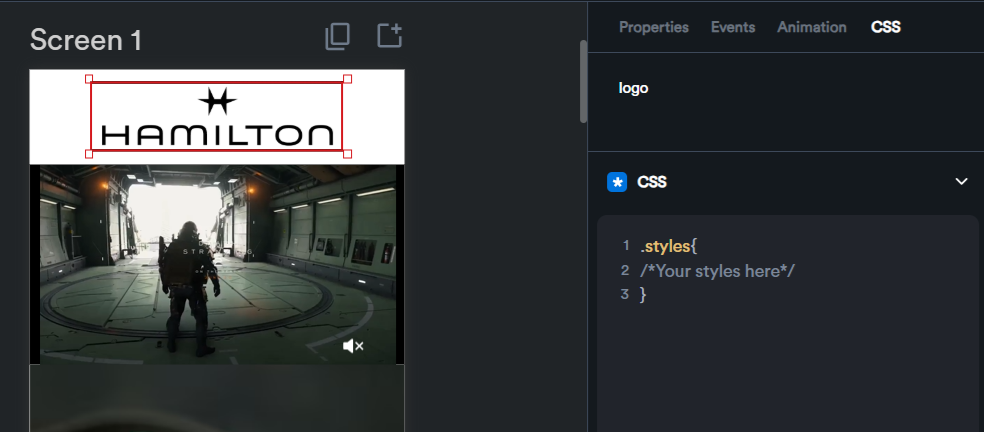
****8. CSS Panel****
The CSS Block allows you to add custom styling to any element in your ad.
[](https://docs.adctv.com/uploads/images/gallery/2025-07/Gruimage.png)
****8. Timeline Panel****
Here, you can create complex animations and set up time-based events. Each component is represented as a layer on the timeline, allowing you to animate elements individually.
You can add keyframes to the timeline to indicate where your animation starts and ends.

****9. Library****
The Library panel displays the images, videos, and other assets that you're using or planning to use in your creative.
You can upload new assets anytime and store them for future use, making it simple to manage and reuse content across multiple pages.

****10. Layouts****
You can select and group multiple components to create a layout. The layout can be named, saved, and reused at any time.
This is especially useful for creating reusable sections, like a header or footer, that you can save and bring into your ads whenever you need them. [Know More..](https://docs.adctv.com/books/product-guide/page/layouts)
****11. Templates****
Here you’ll find templates that match your selected canvas size, so you can quickly pick one and start customizing it for your needs.
Just browse through the list and click ‘Add to Page’ to instantly add a template to your current creative. [Know More..](https://docs.adctv.com/books/product-guide/page/building-ads-from-adctv-templates)
****12. Brand Kit****
With the BrandKit module, you can easily store and manage assets for multiple brands. You can effortlessly share the Brand Kit with collaborators via a unique link, granting them access to brand assets. You can upload logos, save color palettes, add fonts, and include other assets like images and videos. [Know More..](https://docs.adctv.com/books/product-guide/page/brand-kits)